Many users are aware that Power BI offers Row-Level-Security to secure their data. As example you can use RLS so users from a specific country can only see the sales numbers from this country and not others. I did already a blog post about the different possibilities (see https://pbi-guy.com/2021/10/12/power-bi-row-level-security/ & https://pbi-guy.com/2021/10/15/power-bi-row-level-security-organizational-hierarchy/ & https://pbi-guy.com/2021/10/15/power-bi-rls-configuration-in-service/). But many customers don’t only want to secure on a row-base they also want to secure their data on a “column-” or “table-base”. And exactly for this purpose Power BI offers Object-Level-Security. Let me walk you through how to set up OLS in Power BI.
Prerequisites
- Power BI Desktop
- Power BI Service Account
- Tabular Editor
How to
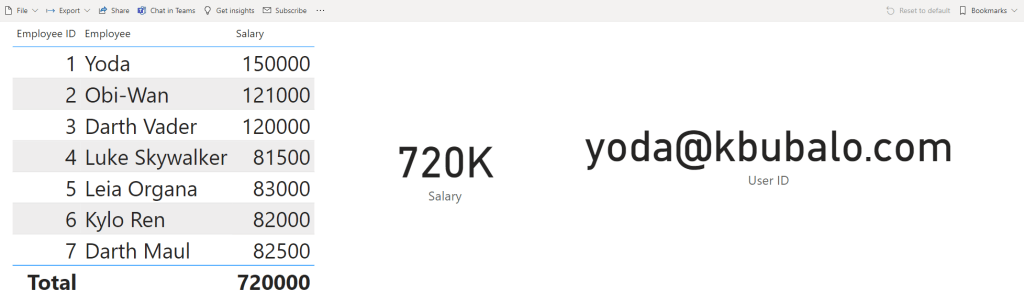
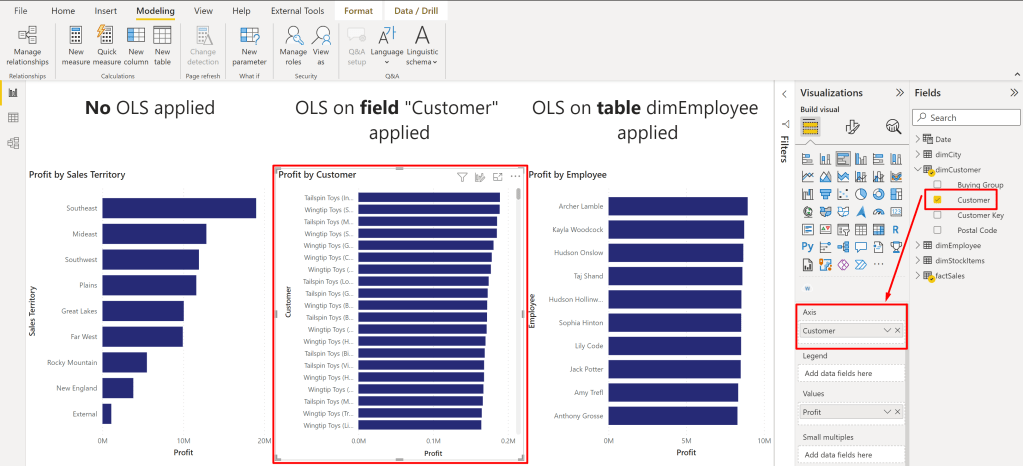
To enable OLS we start in Power BI and create first a data model. I’m going to use my standard Sales Report with Wide World Importers sample data. Further I created three visuals with Text boxes to show the different OLS options – No OLS applied, only on one specific column (customer), and on the whole table (dimEmployee). Every visual shows the Profit by different dimension. First one by Sales Territory, second one by Buying Group, and the third one by Employee.

As a next step we have to create the different Roles so OLS can be applied to it. Go to the Modeling Tab in the Ribbon and select Manage Roles.

In here I created two different roles – one where only the OLS for the column Customer should be applied and one where the whole Table dimEmployee should be secured. No DAX expression or anything else is needed – just the two empty roles. Once done hit the Save button.

After the test page and the roles are set up I connect to my model with Tabular Editor by selecting it through the ribbon External Tools.

Pro Tip: If you open Tabular Editor directly from Power BI Desktop you’ll be automatically connected to your data model.
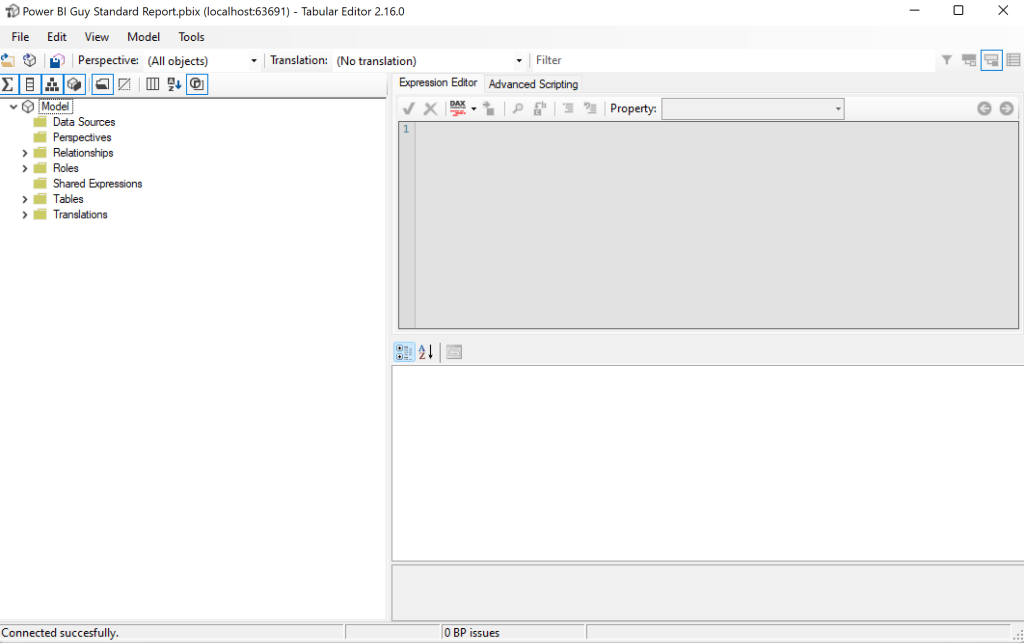
Once Tabular Editor has opened you should see a similar screen like the below.
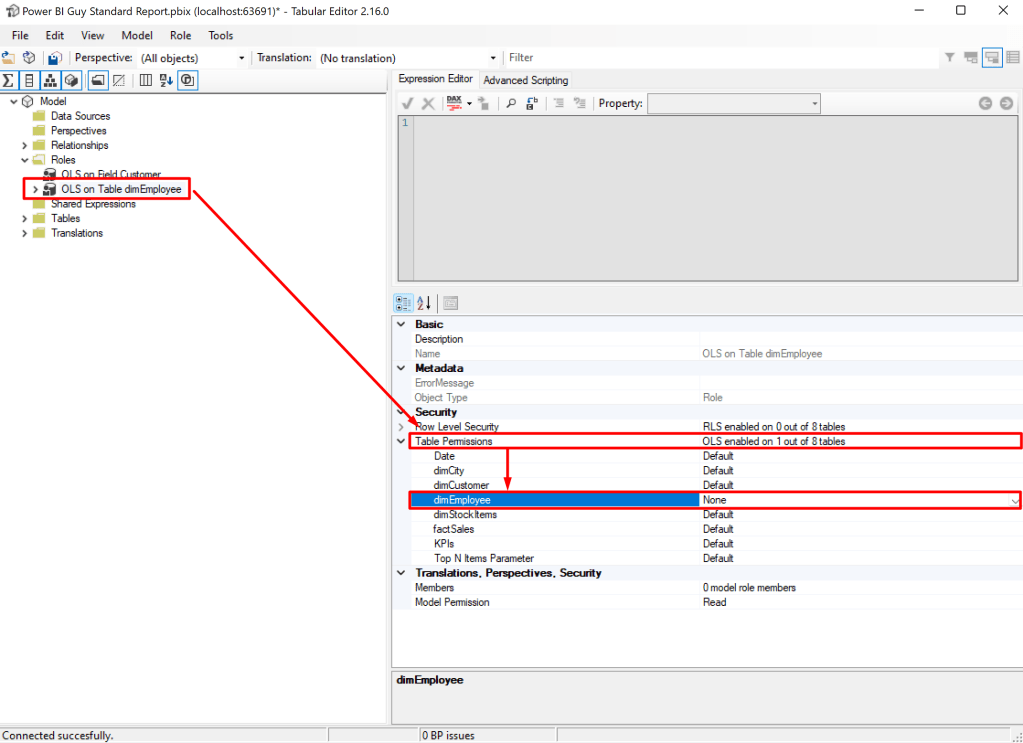
As a next step I expand the Roles and select first the “OLS on Table dimEmployee”. Once the role is selected in the property pane you see a property “Table Permissions” in the “Security” section. Expand it and configure “None” to the table which should be secured. In our case it’s dimEmployee. This means that every user who will be added to the “OLS on Table dimEmployee” role afterwards will not see any data coming from the dimEmployee table.
Now I select the other role and instead of “None” I set the dimCustomer Table to “Read”. The reason is we just want to secure one specific column and not the whole table. Therefore the table can be read in general but we have to configure specific columns which should be secured. After you set the dimCustomer table to read the role can be expanded on the left hand side which lists all tables in “Read” or “None” mode.

Next select the dimTable below the role, head over to “OLS Column Permissions” under “Security” in the property pane and set the column “Customer” to “None”. Every other column will use the Default behavior of the table which is “Read”.

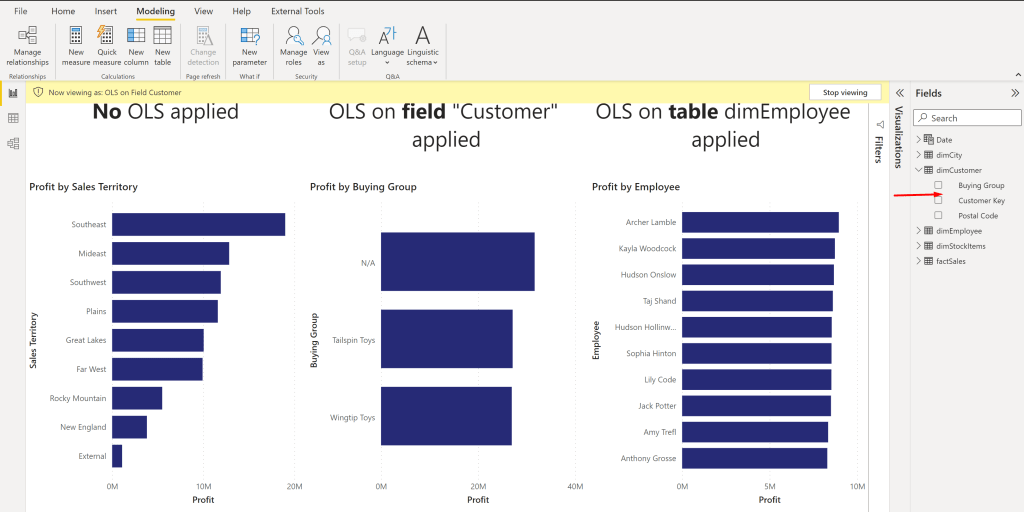
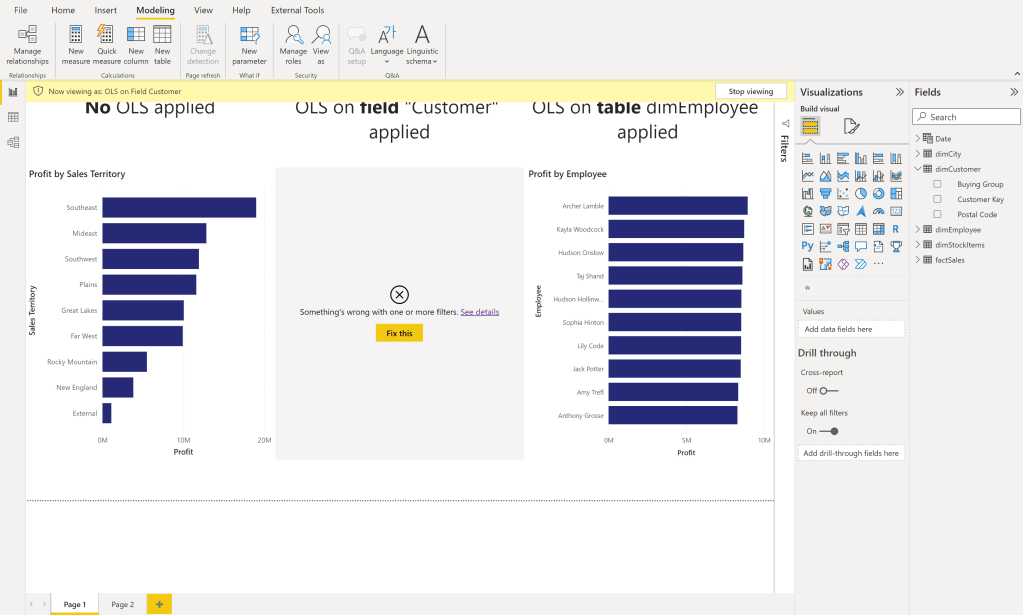
After we set up everything now in Tabular Editor we can save our model and close Tabular Editor. Back in Power BI Desktop let’s test our roles. First I test the “OLS on Table dimEmployee” role by going to Modeling – View as – selecting OLS on Table dimEmployee – and hit OK.

We see that our OLS works because the right hand visual is not showing anything. Further the whole table dimCustomer is also not visible.

That’s exactly what we expected – great! Let’s test the second role. After we switched the view every visual is showing up but the “Customer” field in the table “dimCustomer” is hidden. This is also expected as we’re not using the Customer field in our report so far therefore everything can be shown.
Let’s turn of the role view and replace the “Buying Group” column with “Customer”.
Than we enable the role view again to see if security applies.
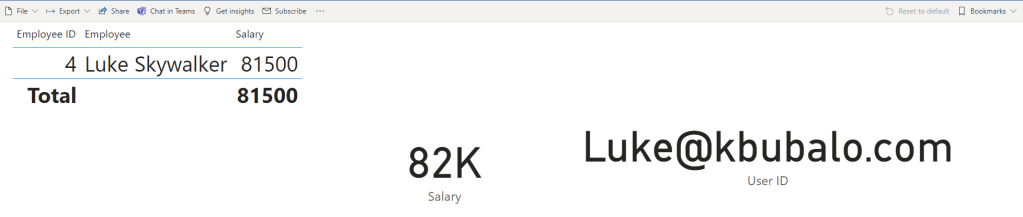
And as we can see yes it does! Because the visual is using the column Customer now it’s not showing up.
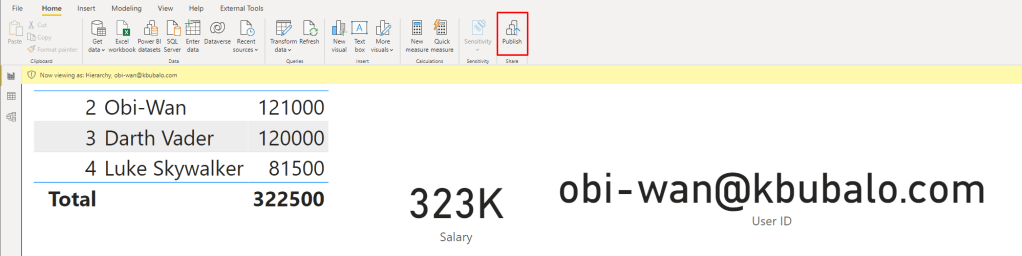
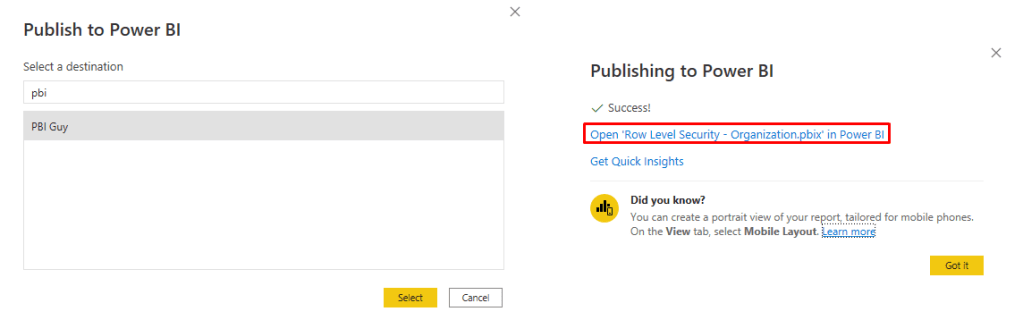
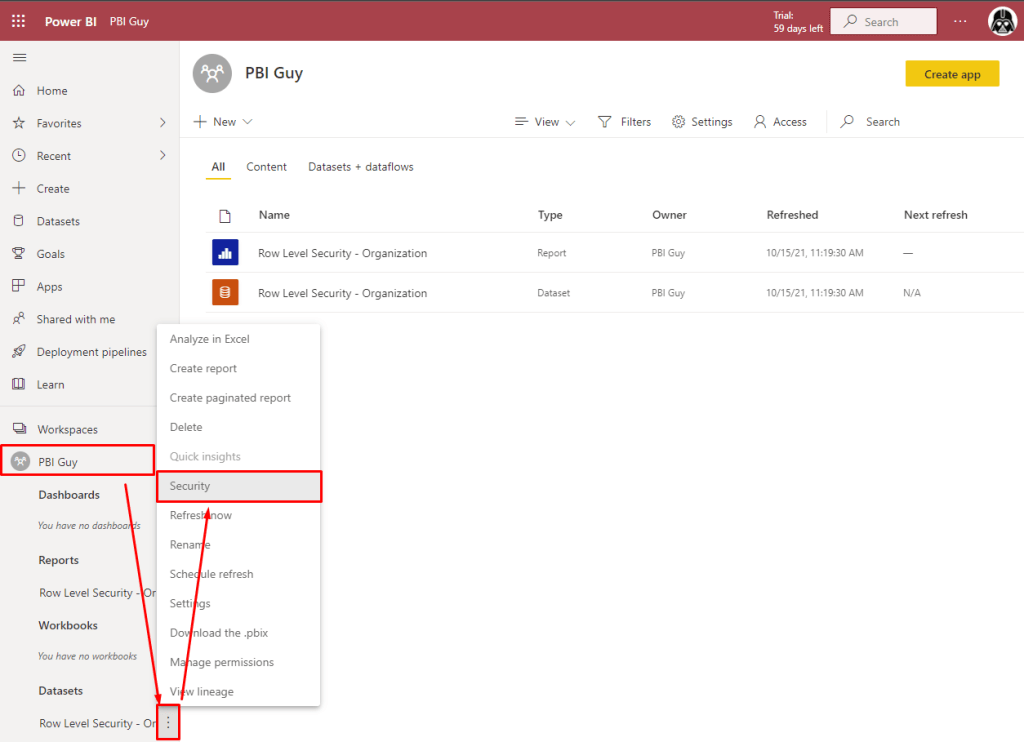
As a last step you would need to publish the report to the Service and assign user / groups to the desired role. One user / group can also be added to multiple roles if needed like with RLS.
Personally, I find the OLS very useful to secure your data model but the message which appears to end user is not very user friendly. I would love to see an update here which says at least it’s secured instead of “Something went wrong” because as an admin it’s expected behavior and not wrong. Best option would be if I could configure the message as I wish.
Please let me know if this post was helpful and give me some feedback. Also feel free to contact me if you have any questions.
If you’re interested in the files used in this blog check out my GitHub repo https://github.com/PBI-Guy/blog