One of the most asked questions when I talk with Power BI Admins / Service Owners is how can they analyze which reports are (most) used. Power BI respectively Microsoft offers you different ways to get such insights. In this blog post I’ll give you an overview of the different ways and walk you through how to leverage the Power BI Admin REST API with Python to extract log files and analyze them – obviously – with Power BI.
What’s available
Here is a quick overview of different ways to get an usage metric of one or multiple reports.
- Usage Metrics
- M365 Audit Logs
- Power BI & Azure Log Analytics
- Power BI & PowerShell
- Power BI REST API
Let’s explore them in more details. First of all the Usage Metrics which is out-of-the-box available in Power BI Service. As of this writing we differentiate between the classic workspace and new workspace Monitor Usage. Both of them gives you insights about the usage of your report. For example you can see how many views, unique viewers, and viewers per day for the specific report. Further, you could edit the report and delete the filter to get an overview of all reports within the same workspace. Unfortunately it’s not possible to have one Usage Metrics report across different workspaces this way which is therefore not the best solution for admins to get a total overview. Lastly, the Usage Metrics gives you an overview of the last 90 days, not more.
Going further with M365 Audit Logs. Each user, who have View-Only Audit Logs, Audit Logs, Global Admins, and/or Auditors permissions, have access to the general M365 Audit Log files. Power BI, like any other M365 service, logs all kind of different activities in the M365 Audit Log for the last 90 days. Therefore you can go the the M365 Compliance Center – Audit and search on different Activities. In the screen shot below I’m searching for Viewed Power BI report and get a result per Date and Time of the different Reports users have accessed (viewed). If wished I can download the result as CSV.

As nice as this possibility is there are two pain points from my point of view. First, if I have the sufficient rights to access the Log Files I have access to every log entry from any other M365 Service as well (e.g. SharePoint Online, Exchange Online, Dynamics 365, etc.), not only Power BI. Secondly, it’s a manual process. As Patrick from Guy in the Cube says: I’m not lazy, I’m efficient. And every manuel process is not really efficient. Therefore let’s explore the other ways, probably we find a better solution.
Since June 2021 you can connect an Azure Log Analytics Workspace with a Power BI Workspace to store automatically activity information. The beauty of this way is that once set up, you don’t have to run any kind of script or do something manually as everything is automatically saved in Azure Log Analytics. Further, it’s just storing Power BI related data and you don’t have access to other Microsoft Services logs. The downside is that Power BI Premium (per Use) and Azure Log Analytics is required, which can increase your costs. Costs for Log Analytics are, from my point of view, not that high. It starts already at $2.76 per GB but still it has to be considered. Prices for Azure Log Analytics can be found here. Another limitation (as of writing this post) is, that you can connect only one Power BI Workspace with one Azure Log Analytics workspace meaning you would need to create one Azure Log Workspaces per Power BI Workspace to store the log data. Of course you can combine it afterwards in Power BI or other tools but it’s still not on one central place. How to use and set up Azure Log Analytics with Power BI can be found here.
Moving on to the next possibility of using PowerShell to extract the log files. Instead of manually extracting the Log File in the Microsoft Compliance Center, as seen above, you can also create a PowerShell script to automatically get the needed data. Microsoft offers a good documentation (see here) how to use it and what’s required. One important thing to keep in mind is that you have two different cmdlet to get your data. One is the Power BI Activity Event (Get-PowerBIActivityEvent) and the other is the Unified Audit Log (Search-UnifiedAuditLog). The first one will give you only Power BI-related data for the last 30 days while the Unified Audit Log will give you access to the whole audit log for the last 90 days. This means you could also get data from other Microsoft Services, not only Power BI. Therefore you’ll find a filter option with the Unified Audit Log to get only Power BI related data (see screen shot below, marked with a red line).
I tested successfully the Unified Audit Log cmdlet as you can see below. I extract one file for the last 90 days in this example but of course you can extract only one day and run the script on a daily basis to get a history of your data (see line #20 in script) The whole script is of course in my GitHub repo.

The best part of this approach is that you can specify what exactly you wish to export – not only Power BI related logs. Further if you’re exporting it on your own you can choose how to store the data (CSV, Excel, Database, etc.) and create a historization. But like with manually extracting the log files you would require sufficient permissions. If you would use the Power BI Activity Log (Get-PowerBIActivityEvent) you won’t have access to the whole log file and you would only require Power BI Admin, Power Platform Admin, or Global Admin rights. And of course you would require some tech skills for this approach to create and use a PowerShell script but even myself with some guidance from Bing and YouTube could create such a script to extract the data and store it as CSV file. 🙂
Lastly, if you’re more familiar working with REST APIs the last option would be your preferred way. As in the document stated Power BI offers a REST API to get Activity Events. Let me walk you through how you can leverage the API with Python and store the data into an Azure Data Lake Gen2 to analyze it afterwards with Power BI.
Requirements
- Create / Use a Service Principal
- Enable Service Principals rad-only access to Power BI admin API in Tenant Settings
- Azure Data Lake Gen2
- Python Skills
- Understanding REST APIs
First of all let’s make sure we have the sufficient permission to run our Python script. Because I wish to automate it and I don’t wish to use my personal account I’ll need a Service Principal. How to register an App / create a Service Principal can be found in this guide. But let me walk you through as well. Log in into your Azure Portal, search for “App Registration” and hit “New Registration”. Give your app a name and select the supported account type (I choose the first option, only Single Tenant). In my case I called my Service Principal “Power BI REST API”.

Note: No API permissions are required as the application’s Azure AD permissions will have no effect. The application’s permissions are then managed through the Power BI admin portal.
Afterwards I created a Security Group called Power BI REST API and added my Service Principal to the group.

Next, we have to make sure that Power BI in general allows Service Principals to use the Power BI Admin REST API. To do so I log in to Power BI, go to the Admin Portal and Enable in the Admin API Settings the necessary feature. Once enabled I add my Power BI REST API Security Group.

Now that we’re ready and have the sufficient permission let’s create our Python script. I’ll do so in the Azure Synapse environment but of course it would also work in any other tool like Visual Studio Code.
As usual with Python let’s import the needed libraries first. In this case we need following libraries:
- msal
This is the Microsoft Authentication Library which we use to authenticate against Power BI. - requests
I’m using the requests library to send my REST API requests. - json
Because the result from the REST API is a JSON format I’m using this library to read the result. - pandas
With this library it’s very easy to create tables (dataframes) and store them afterwards. - date & timedelta from datetime
I need the current date to be able to automate my script and run it on a daily base.

#Import necessary libraries
import msal
import requests
import json
import pandas as pd
from datetime import date, timedelta
Afterwards let’s parametrize our script. First thing, let’s get yesterdays date. Because I want to run the script in the morning, it doesn’t make sense to use the current date as not much have happened. Therefore I’m focusing on the day before with following code:

#Get yesterdays date and convert to string
activityDate = date.today() - timedelta(days=1)
activityDate = activityDate.strftime("%Y-%m-%d")
I’m converting the date into a string in the format of YYYY-MM-DD which is required for the REST API call. Our next step is to make sure we can authenticate with our Service Principal. For that we need the Client ID, Client Secret, Authority URL, and the Scope. If you head over to the Azure Portal where the Service Principal was created (Search for “App Registration”) you’ll find the Client ID in the Overview pane.

To create a Client Secret hit the Certification & Secrets tab and choose New client secret. Configure and add a description and wished. Once created make sure to copy the value because afterwards it won’t be visible anymore and you would need to create a new secret.

For the Authority URL please us https://login.microsoftonline.com/ adding your tenant name at the end. In my case it’s kbubalo.com. Lastly we need the scope which is https://analysis.windows.net/powerbi/api/.default

#Set Client ID and Secret for Service Principal
client_id = ""
client_secret = ""
authority_url = "https://login.microsoftonline.com/kbubalo.com"
scope = ["https://analysis.windows.net/powerbi/api/.default"]
Now let’s set up the REST API URL which we’re calling to get our Activity Data. Looking at the doc here or in the Power BI Admin REST API doc here we see the main request is GET https://api.powerbi.com/v1.0/myorg/admin/activityevents following with the start and end datetime parameter. Because we parametrized our start and end date my URL parameter in Python looks as following:

#Set Power BI REST API to get Activities for today
url = "https://api.powerbi.com/v1.0/myorg/admin/activityevents?startDateTime='" + activityDate + "T00:00:00'&endDateTime='" + activityDate + "T23:59:59'"
As you see we’re adding the time at the start and end date to get the whole day.
Lastly we specify one more parameter for my CSV path where we wish to store the file.

#Set CSV path
path = 'abfss://powerbi@aiadadlgen2.dfs.core.windows.net/Activity Log/'
Now that we parametrized everything that we need let’s create our Python code. First thing to do is to authenticate against the Power BI Service to make sure we can call the REST API. Therefore I’m using the msal and my parameters to authenticate and store the result into a result parameter.

#Use MSAL to grab token
app = msal.ConfidentialClientApplication(client_id, authority=authority_url, client_credential=client_secret)
result = app.acquire_token_for_client(scopes=scope)
If we receive and access token, we would like to proceed calling our Power BI REST API. From the result we have to extract the access token, which will be used to call the REST API, and specify the header. Once done, we can call the REST API URL specified above with the requests.get method.

#Get latest Power BI Activities
if 'access_token' in result:
    access_token = result['access_token']
    header = {'Content-Type':'application/json', 'Authorization':f'Bearer {access_token}'}
    api_call = requests.get(url=url, headers=header)
Reading the doc it says following:
If the number of entries is large, the ActivityEvents API returns only around 5,000 to 10,000 entries and a continuation token. Call the ActivityEvents API again with the continuation token to get the next batch of entries, and so forth, until you’ve gotten all entries and no longer receive a continuation token. The following example shows how to use the continuation token. No matter how many entries are returned, if the results include a continuation token, make sure you call the API again using that token to get the rest of the data, until a continuation token is no longer returned. It’s possible for a call to return a continuation token without any event entries. […]
Therefore we have to call the continuation URL as long as one is given and we wish to store the already called data of course to not lose them. Because of that we create an empty Pandas Dataframe in which we can append our results from each call. Further we store the continuation URL into a parameter and the first result into a second data Dataframe which we append to our empty one. Afterwards we have to do a while loop until no continuation URL is available anymore. Obviously we need to store from each call again our result into a Dataframe and append it to our first (now not empty anymore) Dataframe. Lastly we specify as Dataframe Index the Id URL.

    #Specify empty Dataframe with all columns
    column_names = ['Id', 'RecordType', 'CreationTime', 'Operation', 'OrganizationId', 'UserType', 'UserKey', 'Workload', 'UserId', 'ClientIP', 'UserAgent', 'Activity', 'IsSuccess', 'RequestId', 'ActivityId', 'ItemName', 'WorkSpaceName', 'DatasetName', 'ReportName', 'WorkspaceId', 'ObjectId', 'DatasetId', 'ReportId', 'ReportType', 'DistributionMethod', 'ConsumptionMethod']
    df = pd.DataFrame(columns=column_names)

    #Set continuation URL
    contUrl = api_call.json()['continuationUri']

    #Get all Activities for first hour, save to dataframe (df1) and append to empty created df
    result = api_call.json()['activityEventEntities']
    df1 = pd.DataFrame(result)
    pd.concat([df, df1])

    #Call Continuation URL as long as results get one back to get all activities through the day
    while contUrl is not None:
        api_call_cont = requests.get(url=contUrl, headers=header)
        contUrl = api_call_cont.json()['continuationUri']
        result = api_call_cont.json()['activityEventEntities']
        df2 = pd.DataFrame(result)
        df = pd.concat([df, df2])

    #Set ID as Index of df
    df = df.set_index('Id')
Side note: During the creation of the Python Code I called the REST API for test purpose to make sure it works. During the test phase I received a result with all the columns. That’s the reason why I know which columns and in which order I have to create the empty Dataframe.
Our last step is to save our Dataframe into our ADL Gen2. This is very simple with Pandas Dataframe:

    #Save df as CSV
    df.to_csv(path + activityDate + '.csv')
Make sure to add “.csv” at the end to have the proper file type.
That’s it! Our whole code is done. Let me copy it for you so you have for sure the whole code in proper order.
#Import necessary libraries
import msal
import requests
import json
import pandas as pd
from datetime import date, timedelta
#Set parameters
#Get yesterdays date and convert to string
activityDate = date.today() - timedelta(days=1)
activityDate = activityDate.strftime("%Y-%m-%d")
#Set Client ID and Secret for Service Principal
client_id = ""
client_secret = ""
authority_url = "https://login.microsoftonline.com/kbubalo.com"
scope = ["https://analysis.windows.net/powerbi/api/.default"]
#Set Power BI REST API to get Activities for today
url = "https://api.powerbi.com/v1.0/myorg/admin/activityevents?startDateTime='" + activityDate + "T00:00:00'&endDateTime='" + activityDate + "T23:59:59'"
#Set CSV path
path = 'abfss://powerbi@aiadadlgen2.dfs.core.windows.net/Activity Log/'
#Use MSAL to grab token
app = msal.ConfidentialClientApplication(client_id, authority=authority_url, client_credential=client_secret)
result = app.acquire_token_for_client(scopes=scope)
#Get latest Power BI Activities
if 'access_token' in result:
access_token = result['access_token']
header = {'Content-Type':'application/json', 'Authorization':f'Bearer {access_token}'}
api_call = requests.get(url=url, headers=header)
#Specify empty Dataframe with all columns
column_names = ['Id', 'RecordType', 'CreationTime', 'Operation', 'OrganizationId', 'UserType', 'UserKey', 'Workload', 'UserId', 'ClientIP', 'UserAgent', 'Activity', 'IsSuccess', 'RequestId', 'ActivityId', 'ItemName', 'WorkSpaceName', 'DatasetName', 'ReportName', 'WorkspaceId', 'ObjectId', 'DatasetId', 'ReportId', 'ReportType', 'DistributionMethod', 'ConsumptionMethod']
df = pd.DataFrame(columns=column_names)
#Set continuation URL
contUrl = api_call.json()['continuationUri']
#Get all Activities for first hour, save to dataframe (df1) and append to empty created df
result = api_call.json()['activityEventEntities']
df1 = pd.DataFrame(result)
pd.concat([df, df1])
#Call Continuation URL as long as results get one back to get all activities through the day
while contUrl is not None:
api_call_cont = requests.get(url=contUrl, headers=header)
contUrl = api_call_cont.json()['continuationUri']
result = api_call_cont.json()['activityEventEntities']
df2 = pd.DataFrame(result)
df = pd.concat([df, df2])
#Set ID as Index of df
df = df.set_index('Id')
#Save df as CSV
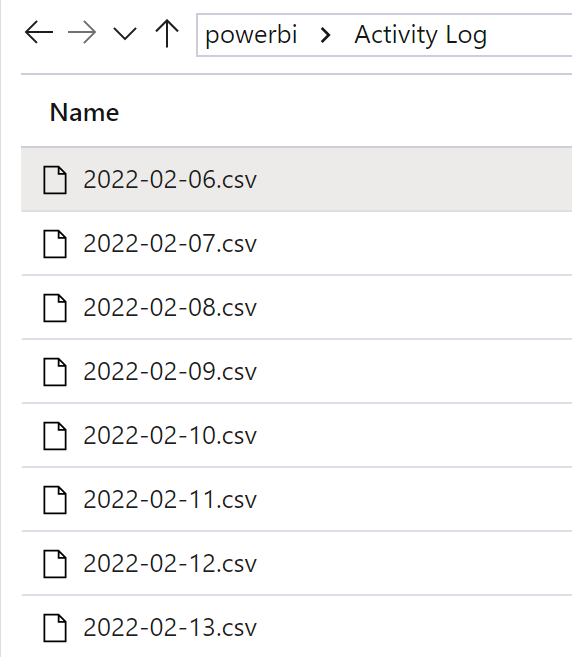
df.to_csv(path + activityDate + '.csv')Let’s test our script by executing it. Once finished I see that a CSV file is stored in my ADL Gen2 – awesome! Now I can automate it in Azure Synapse through a Azure Data Factory Pipeline and run it on a daily base. After a while I see multiple files, one for each day.
Let’s quickly test the result by querying the CSV files through Serverless SQL built-in Azure Synapse (yes, that’s possible!)

Great, we have some data with different Activities!
In my next post I’ll walk you through how to create a Power BI Report on top to analyze the different log files at once – stay tuned!
Please let me know if this post was helpful and give me some feedback. Also feel free to contact me if you have any questions.
If you’re interested in the files used in this blog check out my GitHub repo https://github.com/PBI-Guy/blog
