In my last two posts (see here and here) I wrote about Row-Level-Security (RLS) and how to configure it in Power BI Desktop. This time I would like to show how easy it is to publish a report to the Power BI Service and use the defined roles for specific users or security groups.
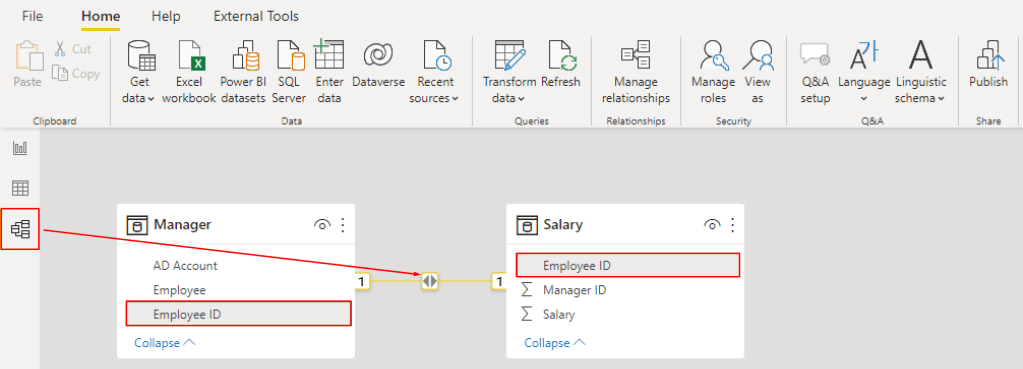
In this post I am going to use my last Power BI file with the RLS organizational hierarchy. As you guessed it right I am a big Star Wars fan and will use those characters for my demo. The picture below shows the current hierarchy.

Of course this hierarchy is not representative for the characters strenghts, popularity or similar. 🙂
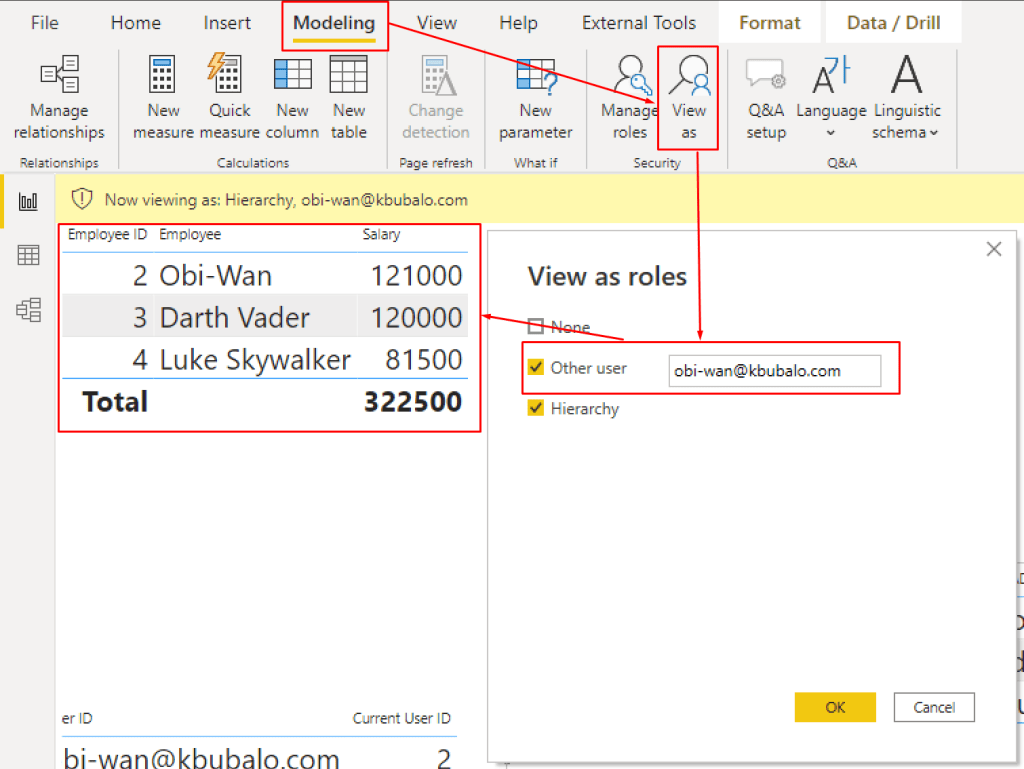
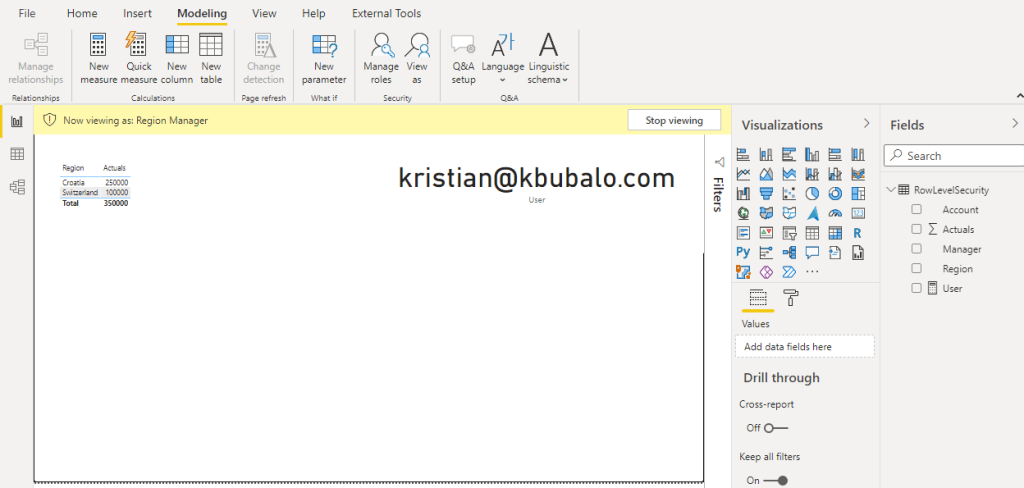
The Power BI Report itself didn’t change a lot. Let’s imagine Obi-Wan is the author and creates a report with a table including all employees (Name and ID) and their salary, a card with the salary information and the current user ID. By pressing the Publish button in the Home Ribbon he can publish the report directly to his workspace in Power BI.
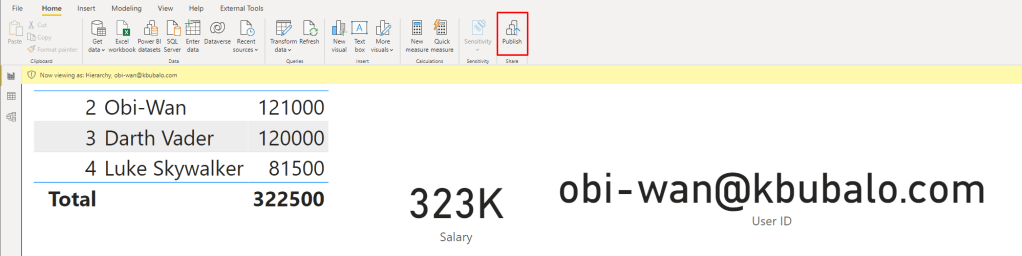
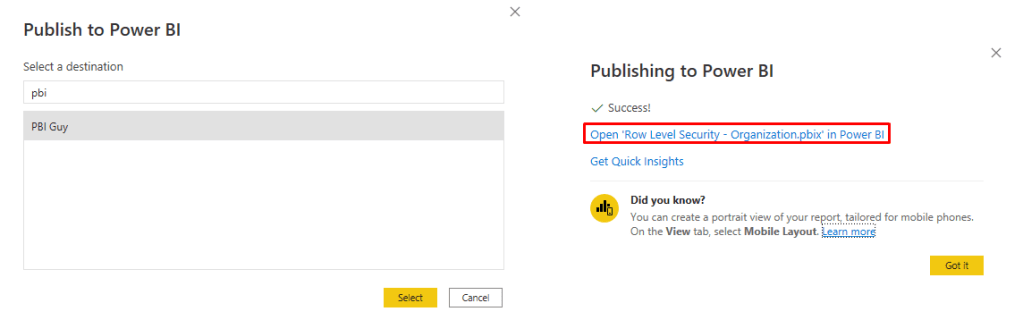
In this case Obi-Wan would like to publish it to the “PBI Guy” workspace. The publishing process will take a few seconds. Afterwards a success message will appear similar to the one below. With a click on the hyperlink the Power BI Report automatically opens in Power BI Services.
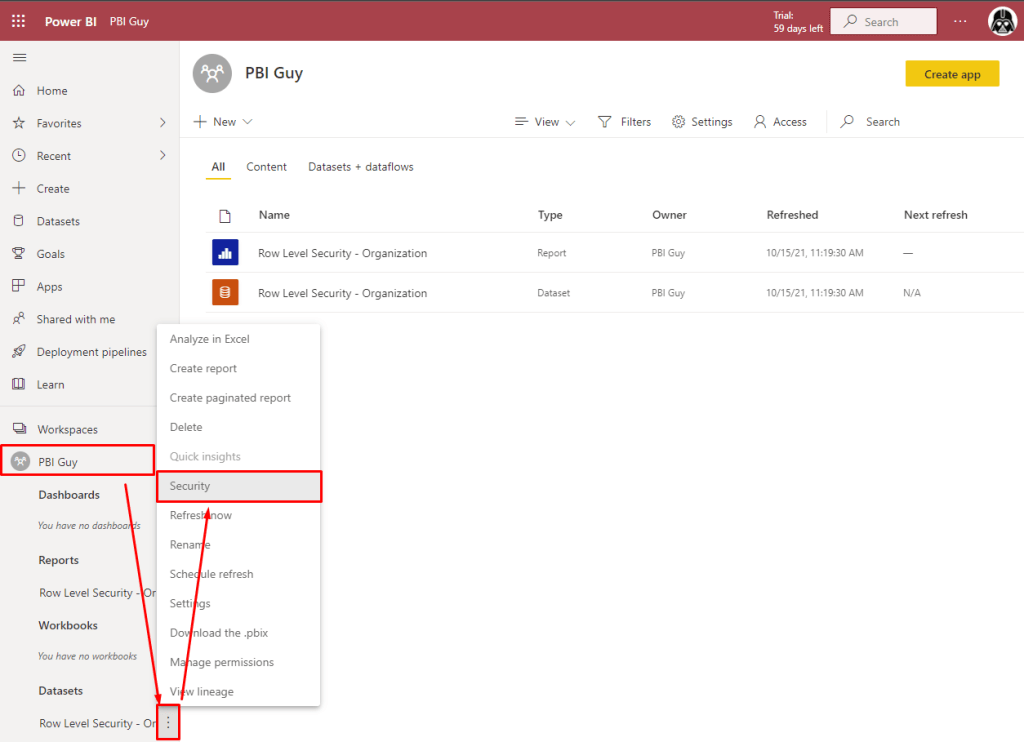
Once Power BI Services has loaded in Obi-Wan’s default browser he can extend the PBI Guy Workspace, hit the three dots of the Dataset and choose Security.
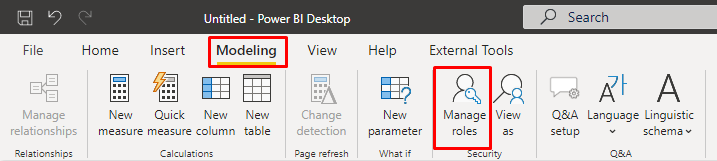
Now all in Power BI Desktop created roles are available and Obi-Wan can add users our groups to it. Because he created just one (Hierarchy) only one is available. Thanks to Azure Active Directory (AAD) suggestions are made while typing. For now he adds Luke and Yoda to the Hierarchy role. You can also add Security, Distribution, and Mail-enabled Groups. Once members are added they will be listed below.

Keep in mind that RLS works only for Viewers and users who has build permission on the dataset. Admin, Member, and Contributor of a workspace are not affected from RLS!
After saving one final step is required – test if RLS works as expected. To do so hit the three dots of her Hierarchy role and choose Test as role.

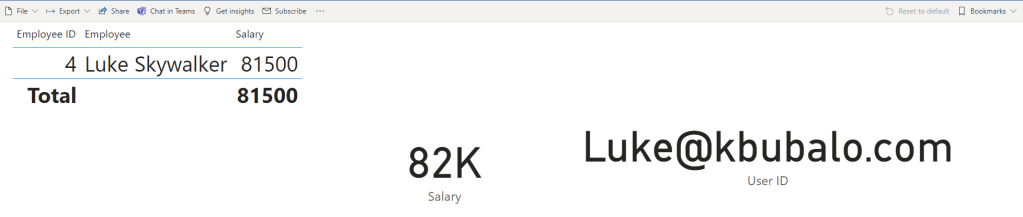
Choose the little arrow at the top and select on which behalf you would like to test the report. In my case I choose Luke and hit Apply afterwards. I do not select the Hierarchy role as it would test it than on my current logged in user.

As we can see RLS works perfectly fine!
One last test as Yoda confirms that RLS is working.
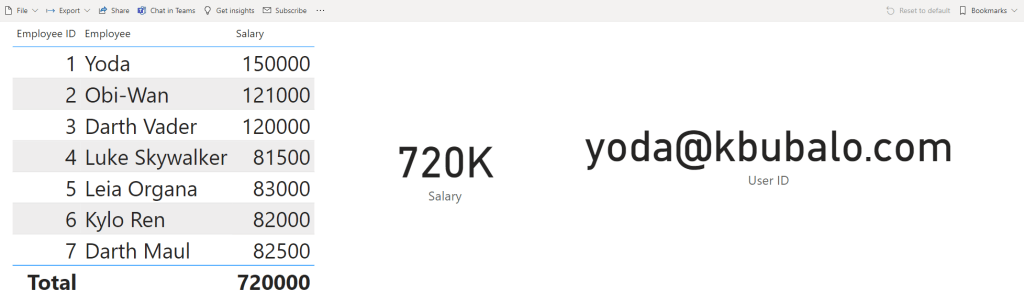
Now I can share the report with all users and only those who has the right permission will see what they are allowed to see – fantastic!
Please let me know if this post was helpful and give me some feedback. Also feel free to contact me if you have any questions.
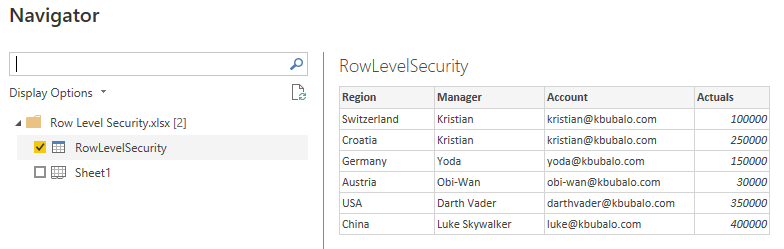
If you’re interested in the PBIX and Excel file used in this blog post check out my GitHub repo https://github.com/PBI-Guy/blog